


My students LOVE drawing donuts. They look forward to it all year when they see the donut artwork hanging from previous classes. This unit is jam packed with art concepts, techniques, vocabulary and so many opportunities to spark creativity.
Obviously, I am majorly inspired by Wayne Thiebaud. He was introduced to me by my best friend (who is also an artist, check her amazing work out here: http://wordlessnews.com) at some point in high school, and I could not BELIEVE how delicious and beautiful his paintings were. In fact, my AP art portfolio my senior year was based around food and the interaction it plays with our daily lives. I live to eat. I love to paint. I cannot stop painting food.
When I moved to Oklahoma I was baffled by the amount of homemade donuts shops around each town. My town is very rural and doesn’t offer much in the way of restaurants and coffee shops, but you better believe there are at least three donut shops. Multiple days a week donuts appear in my school office work room. This and my prior love for any food related art inspired me to work it into my 6th grade curriculum.
Part One: Donut Drawing

DAY ONE: I show students a Wayne Thiebaud painting and usually have each student write down three observations, reactions or questions. We share as a group (sometimes I make each student share one!) and then we move on to the donut drawing.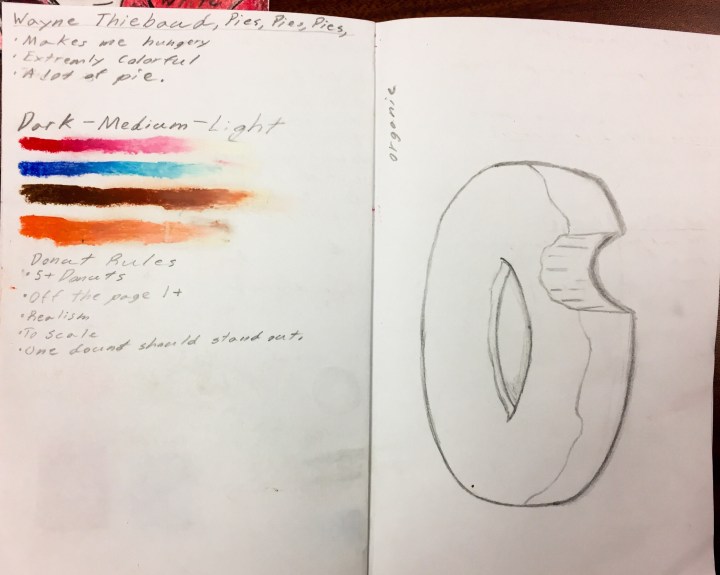
I show the time-lapse portion of this video and then ask for any questions about what they will be learning today. Then we draw one donut together following the steps outlines in the video, but I do it IRL (in real life as I’ve learned) on my document camera. This usually takes 15-20 minutes.
I stop every few steps to check their work giving a thumbs up or a quick piece of advice. This is usually the second or third unit so students are more comfortable with short directions from me. I warn them before we start that this is a “bossy teacher” day with lot’s of steps that I will be quickly checking. I usually tell them they aren’t allowed to raise their hand, just to draw and not be scared to draw a weird donut.
After they have successfully drawn their donut with a bite, I tell them how awesome they did and how hungry they made me. And that’s not fluff! Every single time I’m impressed (and hungry) with the donuts my 6th graders draw. Then I tell them they have to draw another one. Exactly like the one they just did. Without my step-by-step help. I give them the option of drawing (lightly!) on their pastel paper (so many gasps) or to fill another page in their sketchbook.
Part Two: Composition
DAY TWO: Is spent drawing and mapping out their composition. Here are the guidelines I give them:
- REPETITION: 5 or more donuts (always gets a gasp or two)
- EMPHASIS: One needs to stand out more than the rest.
- TO SCALE: All donuts must be life size and consistent (I have them measure 5″ for each one, which is a completely random number)
- COMPOSITION: One (or more!) needs to go off the page (I have a demo for that!)
We start class by looking at student work examples and discussing their composition guidelines. Sometimes I show them a group of student examples and have them guess what the guidelines are. After students are aware of their expectations, I do an off the page demo IRL on the document camera. By the time the demo is over, they have drawn three donuts and have the requirement of off the page already met. CHECK!
I set them loose with their guidelines and play my YouTube tutorial on a loop for visual reminders.
Part Three: Oil Pastels
I LOVE oil pastels. Its a great combination of drawing and painting and I tell students it’s like a fancy crayon, except once you use it you will never want to use a crayon again. I have used Pentel brand for years, but recently switched over to Faber-Castell and I have to admit they last SO much longer. I still love the blendability (is this a word) and intense color of Pentel, but my students go through them reallllly quick.
I have added my Amazon affiliate links for both products below. Affiliate link mean at no additional cost to you, I will earn commission if you click through and make a purchase. I only recommend art supplies I personally love and use myself on in the classroom. #publicschoolteachersidehustle


I like to have students practice blending in their sketchbook first, but I only teach a 40 minute 9 weeks course so sometimes we just get right after it on their pastel paper.
DAY THREE: I have learned that starting with the dough is best. We all use the same colors so it makes the demo and step by step work much easier. I have them lay out their brown, yellow ochre and white and then close their boxes so they aren’t tempted to get out the lemon yellow or whatever other distraction they may have.
We do the dough and then if we have time I also show them shadows. I give them the option of blue (hello, Wayne Thieubaud!) or gray. There’s always the red/orange shadow kid so I explain that shadows are made up of cool colors and it needs to be consistent for each donut.

DAY FOUR & FIVE: The next class two periods are spent on icing. I tell them I have a strict NO SPRINKLES rule until they can show a range of values (dark, medium, light and a “bling bling” highlight”.) I remind them they are not filling in their icing with a solid color like a coloring book, but trying to make their donut look so real you want to pick it up off of the paper.
This step takes the most time and students do get frustrated when I push them to blend their values and get those shiny white highlights.

Part Four: Sprinkles & Emphasis


DAY SIX: Finally, sprinkles and decorations. I remind students that one donut has to be their area of emphasis/ focal point and stand out unquestionably more than the others. This is such a fun part of the unit and I always love the creativity students put into their work. I do have to remind them that every sprinkle (gasp) and all added icing needs a highlight.
One of my favorite things to do at this stage is the “emphasis check”. I will hold up a student’s work to another student and say “Which donut stands out the most?”. Sometimes I will pair them with a partner to take me completely out of the discussion. Students love when students get it right, and boy do they get frustrated when they don’t. This puts the power in the students hands and not mine. It’s not just me picking a donut I say, its the viewer. Just because you want one of the donuts to have the most emphasis doesn’t mean that it actually does. The problem solving that comes with these discussion is some of the best I see out of my 6th graders.


Have early finishers or need an extension activity? Try my oil pastel cupcakes!
Part Five: Gallery Walk & Self-Assessment
After time for a catch-up day or two, it’s time for the Gallery Walk! As I’ve mentioned in previous posts I usually have students vote for certain categories. Typically these are the artworks I hang in the hallway or display case with the student name and their award, such as “Best in Class”. I always always always have students grade their art first. I make sure students write down which donut was their focal point. I tell them you don’t want me to just guess!
Here is a copy of the rubric I created for this lesson. Feel free to adjust it for your personal classroom needs!
Here is a Power Point (I use Google Slides in the classroom) of some of my art history warm-ups. I change it slightly every time I teach it but I always include one warm-up each class period.
I think student comments are super important. I have started adding a section on each rubric for these two questions: What did you enjoy the most about this artwork? What did you find most challenging?
I encourage students to be detailed and honest and let them know they aren’t going to hurt my feelings. I tell them I haven’t been a student in a long time and I can’t read their minds, your voices are important! I also recommend they draw me a fun picture, like a dancing cat.
That makes it wayyyyy more fun to grade!


One thought on “Donut Oil Pastel Lesson Plan”