


This clay bust art lesson is a fantastic way for students to explore figurative art, personal expression and a variety of handbuilding techniques.
Do you have a short attention span like me? This quick video will show you all the steps.
Clay Bust Video Tutorial
This video tutorial is classroom ready and will show you and your students every step of this clay bust art lesson. It’s great for review, showing steps in advance or students to use independently.

We started with sketching and brainstorming. Class always starts with art history warm-ups (I call it bellwork because #itiswhatitis) and students had already started looking at clay busts.
If you are interested in my daily art history warm-ups, here is a detailed blog post:


I did not give students a theme this time, but I have before. I have had one group of students create self portraits, which they were more hesitant about than I would have guessed. Another group of advanced students researched a human rights issue and created busts exploring that theme. This was my senior International Baccalaureate students and there was a large writing portion that went along with it.


More recently, I taught sculptural busts to my Sculpture II class. This particular group has a mixed bag of ability levels and motivation and I experimented with being more open ended with their prompt. I relied on teaching the correct hand building techniques and encouraged their own personal creative exploration. As with any class setting, some students soared and others had trouble leaving the ground.


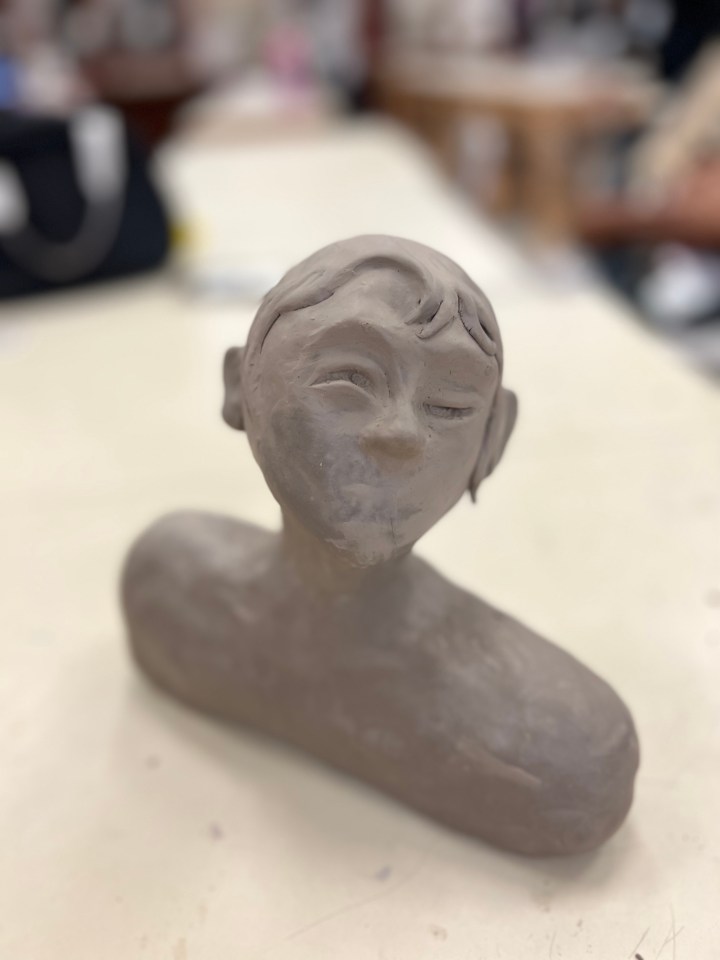
After sketching and looking at a variety of examples, we began by creating two basic forms. I have taught this lesson two different ways. The first few times I taught it, we worked with slabs and coils to construct our clay forms. This time around we used a subtractive technique. I highly prefer the subtractive method and the student success rate was much higher. Of course there are always issues with dry time, small pieces and things breaking; but overall students had much more confidence with this technique.
Students created their shoulder/torso form first by using a large block of solid clay. Students focusing on creating the overall size and shape and the block of clay made it very user friendly. They almost seemed to make themselves! This was wrapped up in a separate bag and stored to slowly dry a little before we carved it out.
The next class period, we got a second hunk of clay and created the neck and head. The neck can also be added as a third piece or as part of the torso. It depends on personal preference. Students were a little more stressed since a head is more challenging to form. I randomly have plastic human heads lying around (IYKYK) and we used that as references along with images pulled up on their Chromebooks.
Some students were not using human forms, and I encouraged them to have as many angles pulled up as possible of the skeleton of their animal/robot/whatever. We rotated the clay to view it from all angles and played with placement. Many students were committed to realism and many were not. This assignment can seem intensely challenging at first, but abstraction and simplification can also yield beautiful results.


The head was also wrapped up in a separate bag and students typically worked on this in a second class period. Once clay dried a little (somewhere between workable and before leather hard) we began carving them out. This is hard to explain in writing and will vary from student to student. If the clay is too plastic, it won’t support itself once carved out. If clay is too dry it becomes fragile and problematic when adding all the fresh clay facial details. When in doubt, carve the clay to hollow it out but wait to attach the two pieces. I encouraged most students to begin adding facial features before the head was attached to the shoulders.
I love coming up to students with my wire tool and declaring it was time for me to cut their heads in half. There was something morbidly satisfying about the entire experience. Once each piece was cut in half, they scooped out the extra clay leaving about a .5-.75 of an inch wall. The head reminded me of scooping out the yolk of a deviled egg. I like students to leave the clay walls a little more on the thick side. Thicker clay just needs more time to dry, but thin clay can cause weak construction.


Once I checked each and every half, because I am obsessive, students scored, slipped and blended the pieces back together. There needs to be a large air hole connecting the torso, through the neck and to the head. If you do not allow air flow there may be an issue with trapped air when it’s fired in the kiln. I also discreetly poked a few air holes in the head as well as the shoulder area once it is attached back together. This is a similar concept to poking an air hole on a pinch pot rattle or any other hollow clay form.
Once the major construction is underway, it is time to work on all the details, textures and creative details. This part is so much fun and my students always amaze me at how outside the box they can be.


Dry time is exceedingly important to the success of this artwork. There is a myth that air bubbles in clay cause explosions, but it is 99.99% caused by moisture being trapped in the clay body. As the temperature of the kiln rises, the moisture becomes steam and the clay will explode as the moisture tries to escape. I do a one week MINIMUM dry time on any clay piece, no matter how small. For these, I set aside two weeks. Many students worked small, but I did not want to chance it.
Another amazing trick is to use your kiln’s preheat setting. I like to add a four hour preheat to my bisque firing and I kid you not, it works 100% of the time. The preheat holds the temperature at 200 degrees and the moisture works itself out before it raises to a boiling pot temperature. Game changer.


Once the pieces are out of the kiln, there are so many directions students can take for surface treatment. If it is a small class, I love for students to experiment with underglazes. I have some expensive underglaze watercolor sets that yield amazing results.
Underglaze and Glazing


Gloss or Crystallex glazes are also a great choice, if the students want more simplified and less realistic results.

Cold Finish and Acrylic Painting
Sometimes glazing isn’t the best option, especially if an artwork has issues during the bisque firing. A careful application of acrylic paint can sometimes be a great option, depending on the skill level of your students.

There are also many cold finish options:

Many of my students are talented painters and make acrylic paint look amazing on clay. However, acrylic paint on clay can easily look awful. So I always take in account the skill level of the student. If you are looking for a fail proof option, paint the sculpture with black acrylic paint and then dry brush metallic paint after it dries. It looks amazing every time and can elevate even the most basic sculptures.


